

Welcome to our first Nomad Sculpt tutorial, where we’ll create the adorable Mokona from Magic Knight Rayearth! This beginner-friendly guide focuses on the power of spherical shapes and how to modify them using essential tools like Move, Tube, Inflate, and Paint.
What You’ll Learn:
• Mastering Spherical Forms – Understanding how simple shapes can be the foundation of complex models.
• Efficient Sculpting Techniques – Modifying geometry without overloading your mesh.
• Low-Resolution Workflow – Keeping your shape clean and workable while maintaining detail.
By the end of this tutorial, you’ll have a solid grasp of how to sculpt efficiently, keeping your model lightweight while achieving smooth and organic results. Let’s dive in and bring Mokona to life!
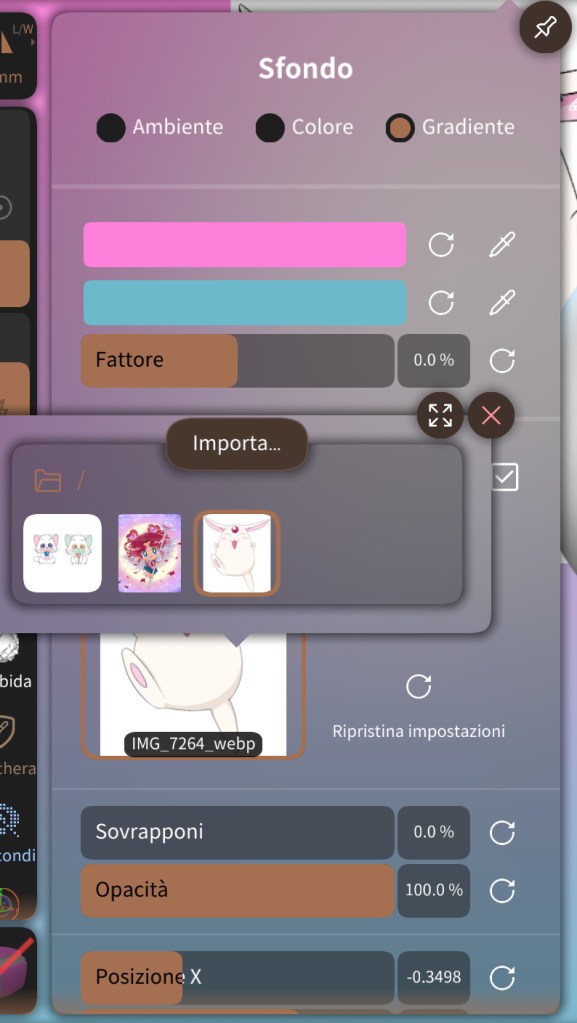
How to Import a Reference Image in Nomad Sculpt
Using a reference image in Nomad Sculpt can help you stay accurate and improve your sculpting process. Follow these simple steps to import an image and display it in the background of your workspace.
Step-by-Step Guide:
1. Open Nomad Sculpt and ensure your project is ready.
2. On the left side of the screen, you’ll see a row of icons. Tap on the “Image” icon to open the image settings.
3. A pop-up window will appear, asking you to import a reference image.
4. Navigate to your gallery and select the desired image.
5. Once selected, the image will immediately appear in the background of your sculpting workspace.

Shaping the Base Form: From Sphere to Egg Shape in Nomad Sculpt
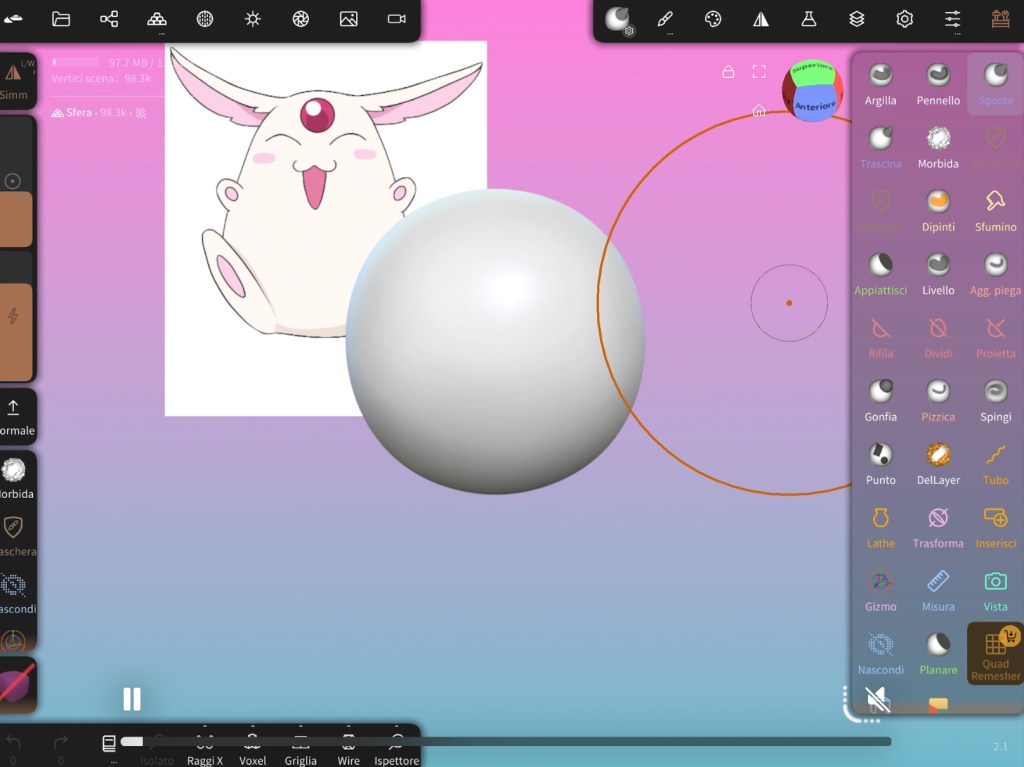
Now that we have our reference image in place, it’s time to start sculpting! The first step is to position the base sphere in the front view and begin shaping it into an egg-like form, keeping proportions consistent from every angle.
Step-by-Step Guide:
1. Select the Move Brush – On the left toolbar, tap on the Move tool. This will allow you to push and pull the geometry to achieve the desired shape.
2. Position the Sphere – Make sure the sphere is placed in the front view, aligning it with your reference image for better accuracy.
3. Stretch the Shape – Using the Move brush, gently pull the lower part of the sphere downward to create an elongated, egg-like form. Start with small adjustments to maintain smoothness.
4. Check Proportions from All Angles – Rotate the model frequently to ensure that the shape remains well-balanced and symmetrical. Adjust the sides, top, and bottom as needed to match your reference.
5. Refine the Base Shape – Keep sculpting until the form looks natural, maintaining even proportions from every direction. Avoid extreme deformations, as we want a smooth and organic base to work from.
At this stage, we are laying the foundation for the entire sculpt. A well-shaped base form will make the rest of the modeling process much easier and more efficient. Take your time to get it right, and stay tuned for the next steps in bringing Mokona to life!
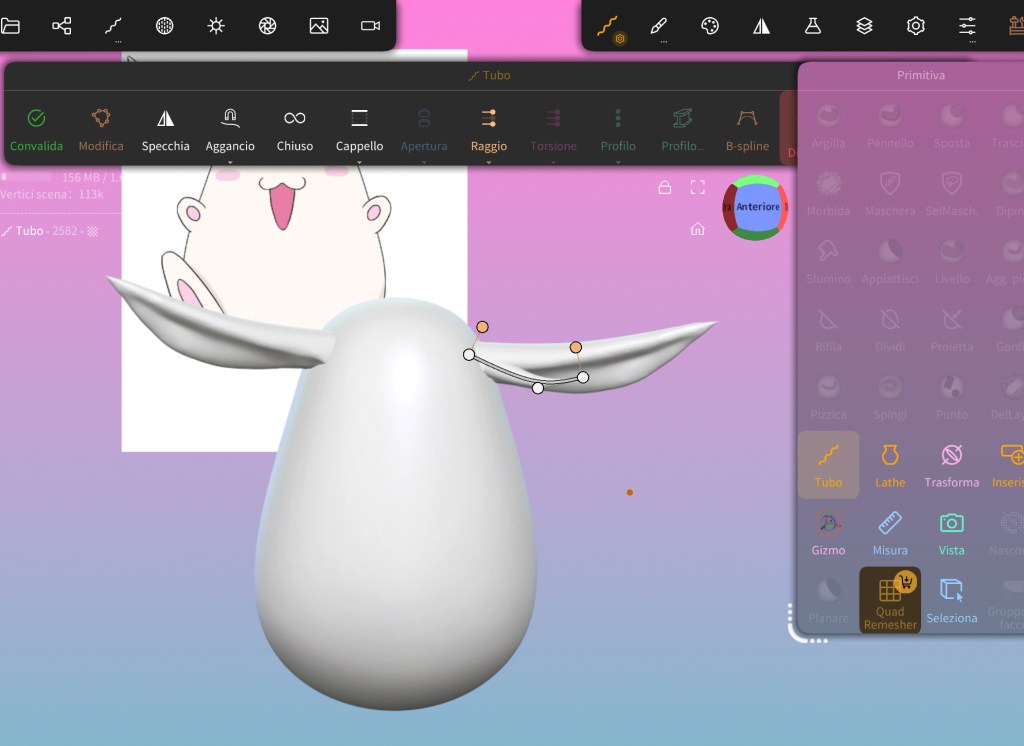
How to Create Mokona’s Ear in 3D Modeling Software
1. Create the Base Shape:
• Select the Tube Tool and drag a line on the left or right side of Mokona’s body.
• This will act as the base shape for the ear.
2. Adjust the Shape:
• Use the Points Tool on the Deformation Manipulation Tool that appears after dragging the line.
• Adjust the points to shape the ear properly.
3. Mirror the Ear:
• Once you’ve finished shaping the first ear, mirror it to the other side to maintain symmetry.
4. Add Depth to the Ear:
• Use the Vairal Mesh feature and set the resolution to 250 to refine the shape.
• Select the Mask Tool and drag inside the ear to create depth.
• Use the Gizmo Tool to push the masked area inward for a realistic look.
• Once done, clear the mask to finalize the shape.
5. Add Extra Details (Optional):
• If you want more details, use the Tube Tool again.
• Apply the same technique as before to sculpt additional features, such as folds or ridges.
This workflow ensures accurate ear modeling with clean geometry and precise details.
How to Create Mokona’s Paws in 3D Modeling Software
1. Create the Base Shape for the Paws:
• Select the Sphere Tool and create a sphere.
• Use the Move Tool to resize and position it on one side of Mokona’s body.
2. Duplicate the Paw:
• Clone the sphere and drag it to the other side to create the second paw.
3. Create the Bottom Paws:
• Use the Move Tool to drag another sphere to the bottom.
• Adjust its shape by elongating it slightly for a natural look.
4. Add Paw Pads:
• Create a smaller sphere and place it inside the paw to form the paw pad.
• Change its color to pink for a realistic touch.
• Repeat this step for the rest of the paws.
This method ensures a smooth and well-proportioned paw design while maintaining proper symmetry and color detail.
How to Create Mokona’s Eyes and Mouth in 3D Modeling Software
1. Shape the Eyes and Mouth:
• Select the Tube Tool, just like you did for the ears.
• Drag it into an arched shape to form the eyes and mouth.
2. Position and Blend:
• Use the Move Tool to adjust the arch and place it correctly on Mokona’s face.
• Move the shape slightly inside the body to blend it seamlessly.
3. Refine the Details:
• Adjust the depth and positioning to ensure a natural integration with the model.
This method ensures smooth and well-integrated facial features, giving Mokona a polished and professional 3D appearance.
How to Create Mokona’s Tail in 3D Modeling Software
1. Create the Base Shape:
• Select the Sphere Tool and generate a sphere.
2. Resize the Tail:
• Use the Gizmo Tool to move and scale the sphere to a smaller size.
3. Position the Tail:
• Place the sphere on the lower back of Mokona’s body to create the tail.
This technique ensures a well-proportioned and natural-looking tail for your 3D model.
Final Touches: Creating the Mouth and Adding Color in 3D Modeling Software
1. Create the Mouth:
• Select the Mask Tool and mask the area where the mouth will be.
• Invert the mask so the mouth area is active.
2. Add Depth to the Mouth:
• Use the Inflate Tool and gently drag inside to create depth.
• Once satisfied, clear the mask to finalize the shape.
3. Add Color Details:
• Select the Paint Tool and apply pink color to the cheeks and inner ears for a soft, natural look.
This step enhances the character’s expression and finalizes the model with realistic details.
Conclusion: Completing Your Cartoonish 3D Mokona Model
By following these steps, you’ve successfully created a cartoon-style 3D model of Mokona with smooth, rounded shapes and expressive features. From sculpting the ears, paws, and tail to refining the eyes and mouth, each step ensures a clean and polished look.
Using the Tube Tool, Mask Tool, Inflate Tool, and Paint Tool, you’ve added depth and personality, blending each element seamlessly into the body. The final touch of pink accents on the cheeks and ears enhances the cute and playful appearance.
With this structured workflow, you now have a well-proportioned and visually appealing cartoonish Mokona model, perfect for animation, 3D printing, or artistic projects.
